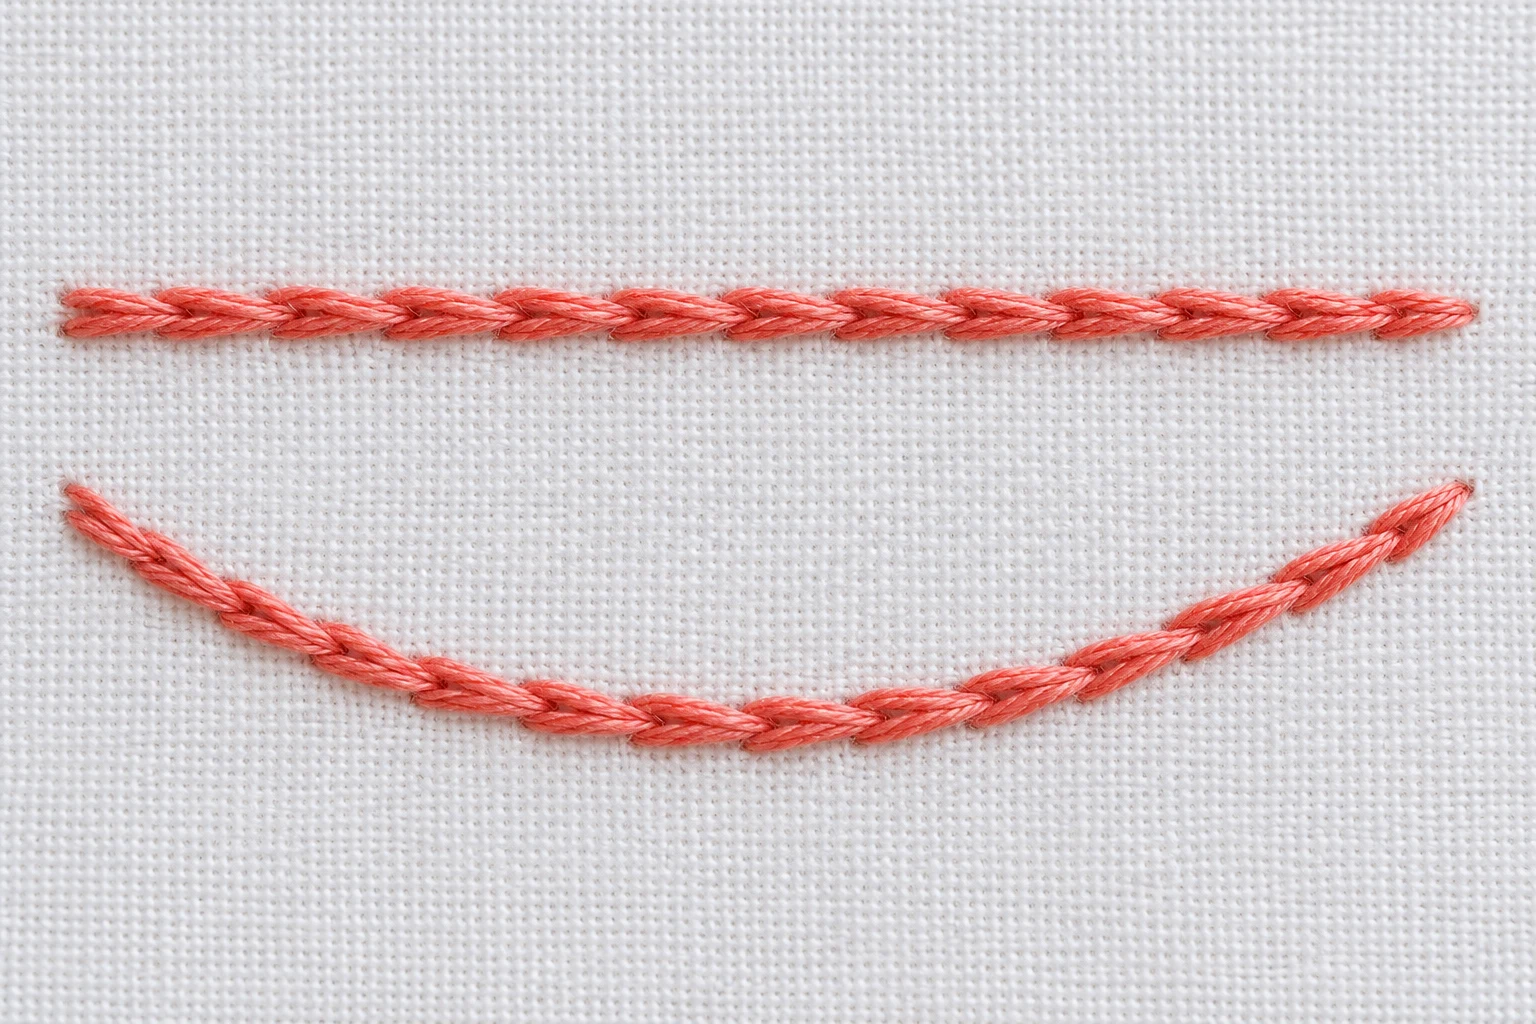
Split stitch makes a lightly textured continuous line by bringing the needle up through the thread of the preceding stitch. It is useful for outlines and curves, and can support the edge beneath a filled shape. It differs from backstitch, which returns to an endpoint without splitting the thread.
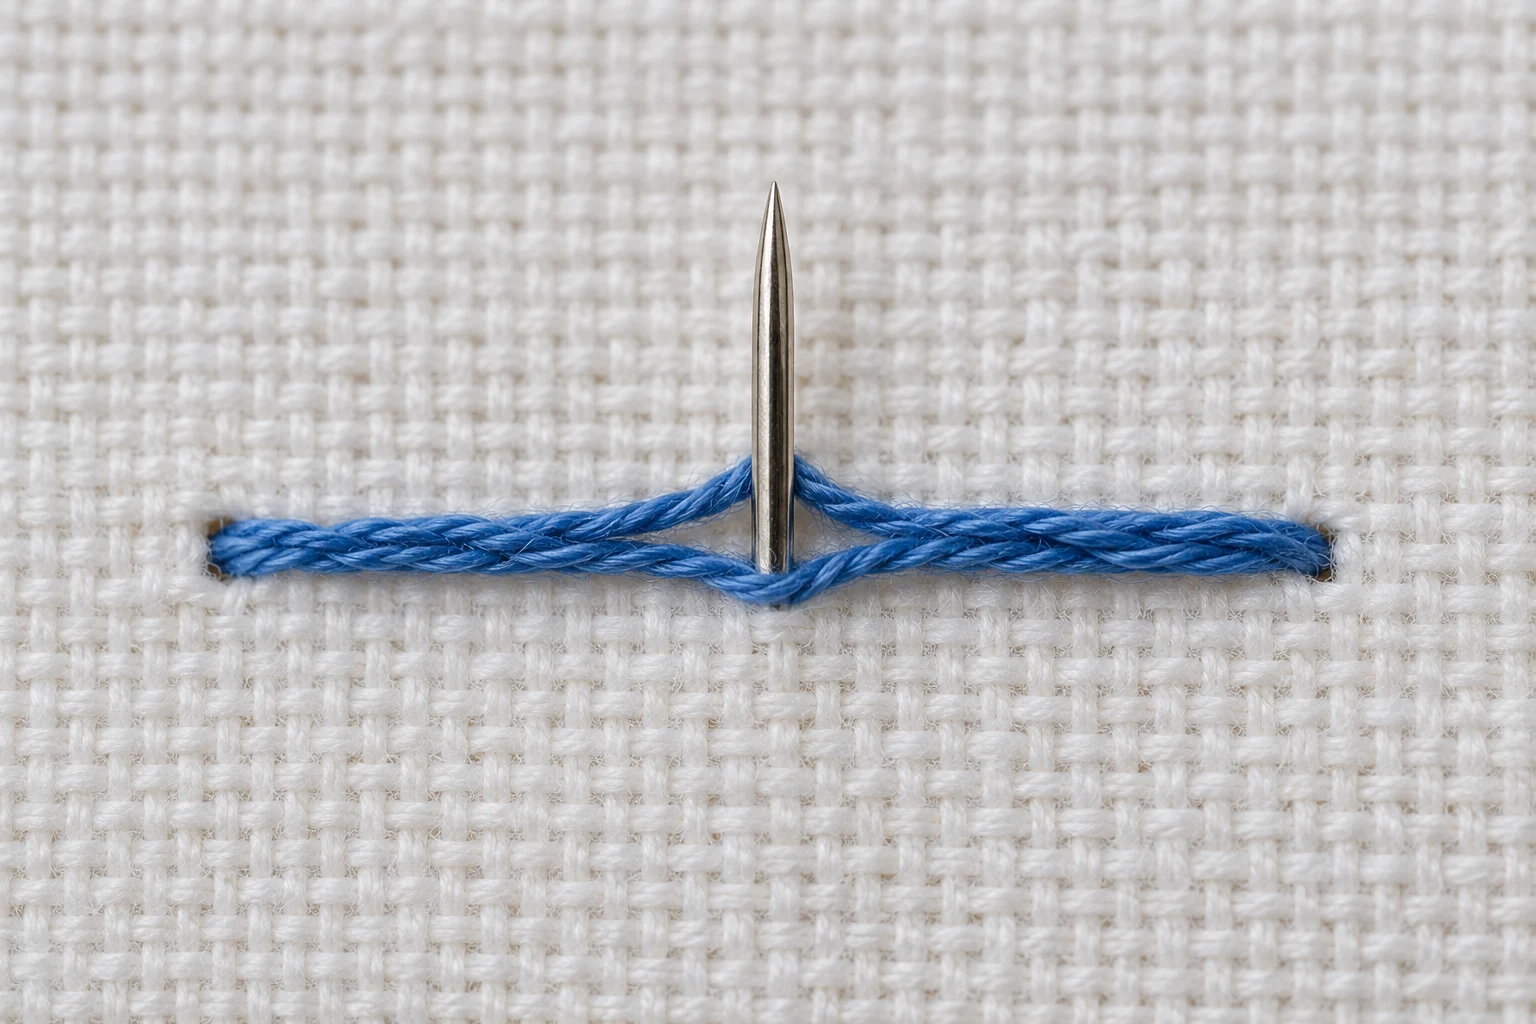
Make a short straight stitch, then bring the needle up through its middle, separating the thread fibers. Take the needle down ahead to extend the line and repeat with steady spacing.
Choose a thread that splits cleanly
Use a sharp embroidery needle and stranded cotton suited to the scale of the line. A small even bundle can be easier to split evenly when learning than a very chunky one. Test a few stitches before following a curved design.
Draw a short line with a gentle bend on stable hooped fabric. Keep the first stitches small enough that you can locate their centers clearly.
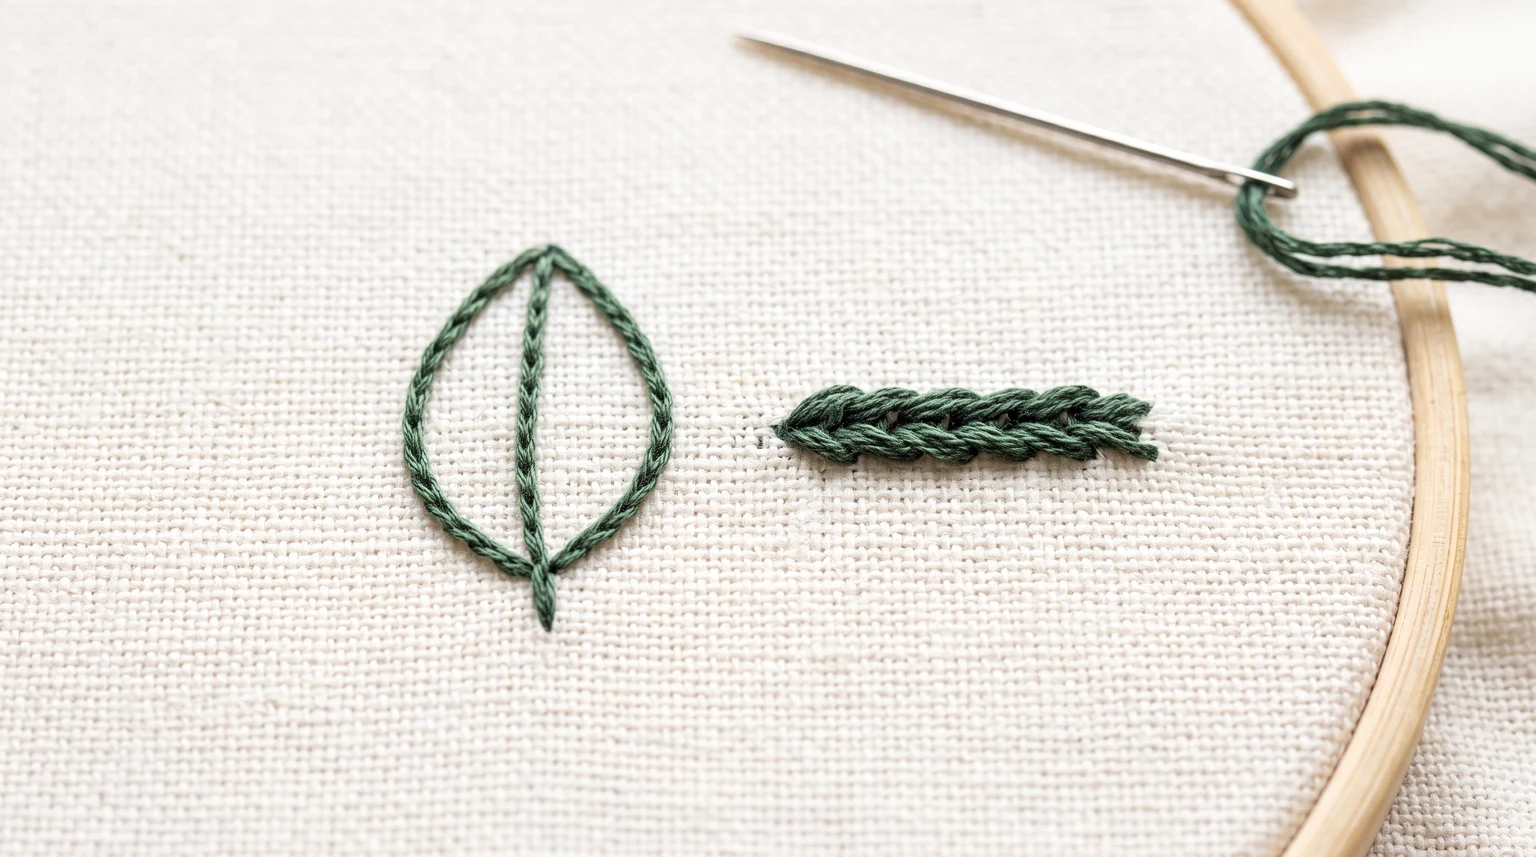
Make split stitch step by step
- Bring the needle up at the start of the line.
- Take it down a short distance ahead to make the first stitch.
- Bring the point up through the middle of that stitched thread.
- Pull gently so the thread divides around the needle without being dragged out of place.
- Go down ahead to extend the line.
- Continue splitting the previous stitch as you advance.
Shorten the segments around a tight curve. Keep the new entry point on the design line so the outline does not drift sideways.
Keep the line even and avoid fraying
If the needle misses the thread, pause and replace that stitch while it is easy to reach. Repeatedly stabbing the same section can damage the floss.
A rough or fuzzy line may need a sharper needle, a shorter working length or a more suitable thread bundle. Compare it with backstitch for a crisp segmented line and stem stitch for a different flowing texture.
Frequently asked questions
Do I split the fabric or the thread?
You bring the needle through the stitched thread while passing through the fabric underneath. The distinctive part is dividing the previous stitch's thread.
Can split stitch be used under satin stitch?
A fine supporting outline can help define a fill edge. Keep it light enough that the satin filling can cover it without a bulky ridge.
Further reading
Adapted from SimpleEnglishGuide.pdf, PDF pages 14. Wording and practical notes have been edited for this website.