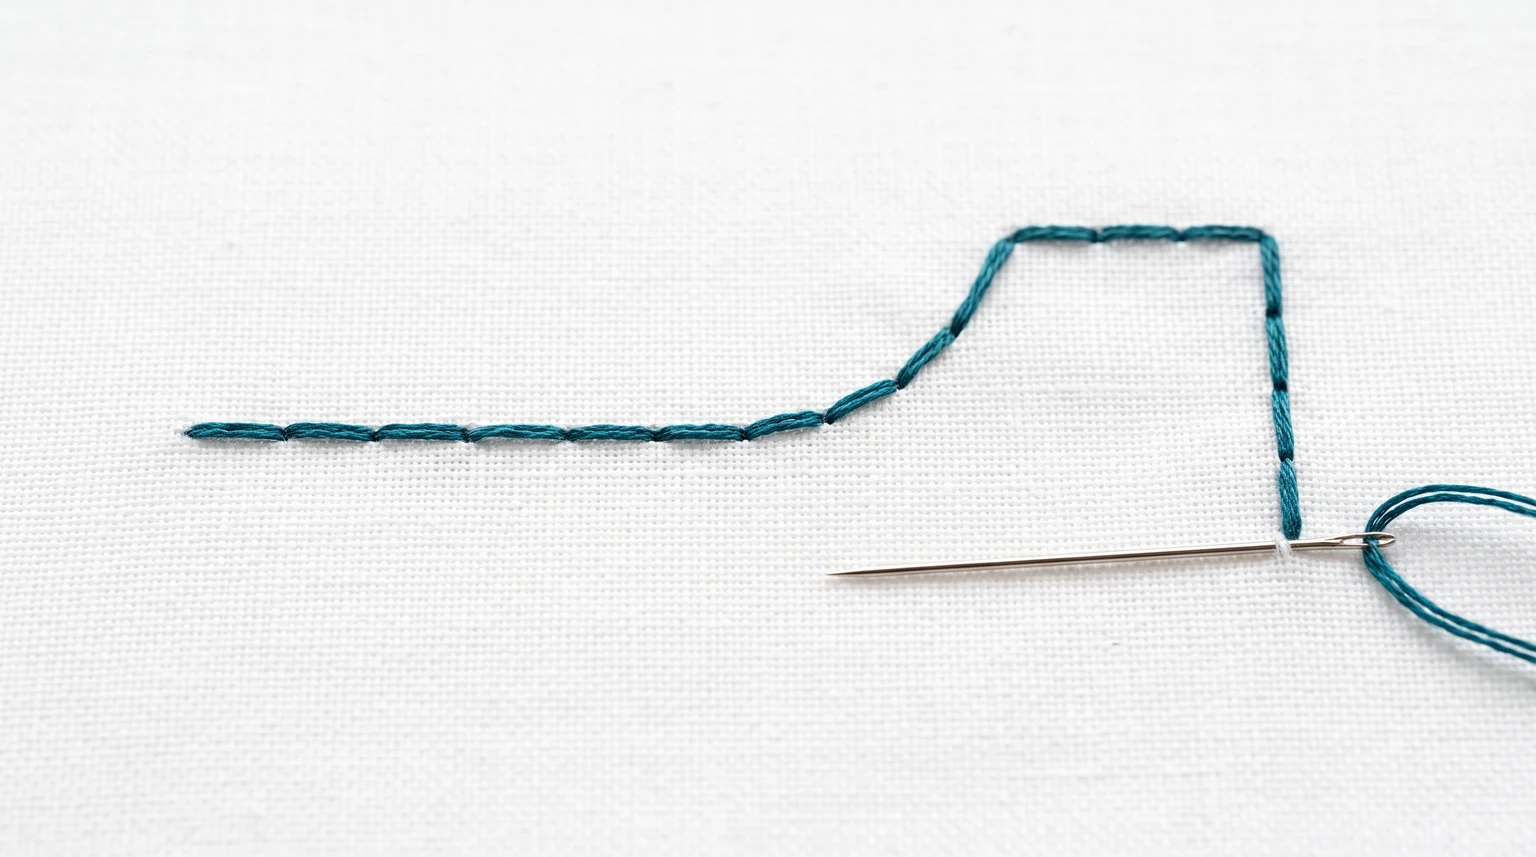
Backstitch is a connected line of short stitches that works well for outlines, simple lettering and small structural details. Each new stitch moves backward to meet the previous one, even though the line as a whole advances across the fabric. It is a useful first embroidery stitch because you can practise spacing and tension without filling a large shape.
Make one straight stitch. Come up one stitch length ahead of its end, then go down at the end of the previous stitch to close the gap. Repeat along the line, shortening stitches where a curve becomes tight.
Prepare thread, fabric and a practice line
Use a stable woven cotton in an embroidery hoop, a sharp embroidery needle and two strands of cotton floss for a first trial. Draw a short straight line and a gentle curve with a tested removable marking tool.
A stitch length of about 2-3 mm is a useful practice starting point on an ordinary small sampler. Adjust for the drawing rather than treating that measurement as a rule. A thicker thread or a larger motif may need longer stitches; tiny lettering needs shorter ones.
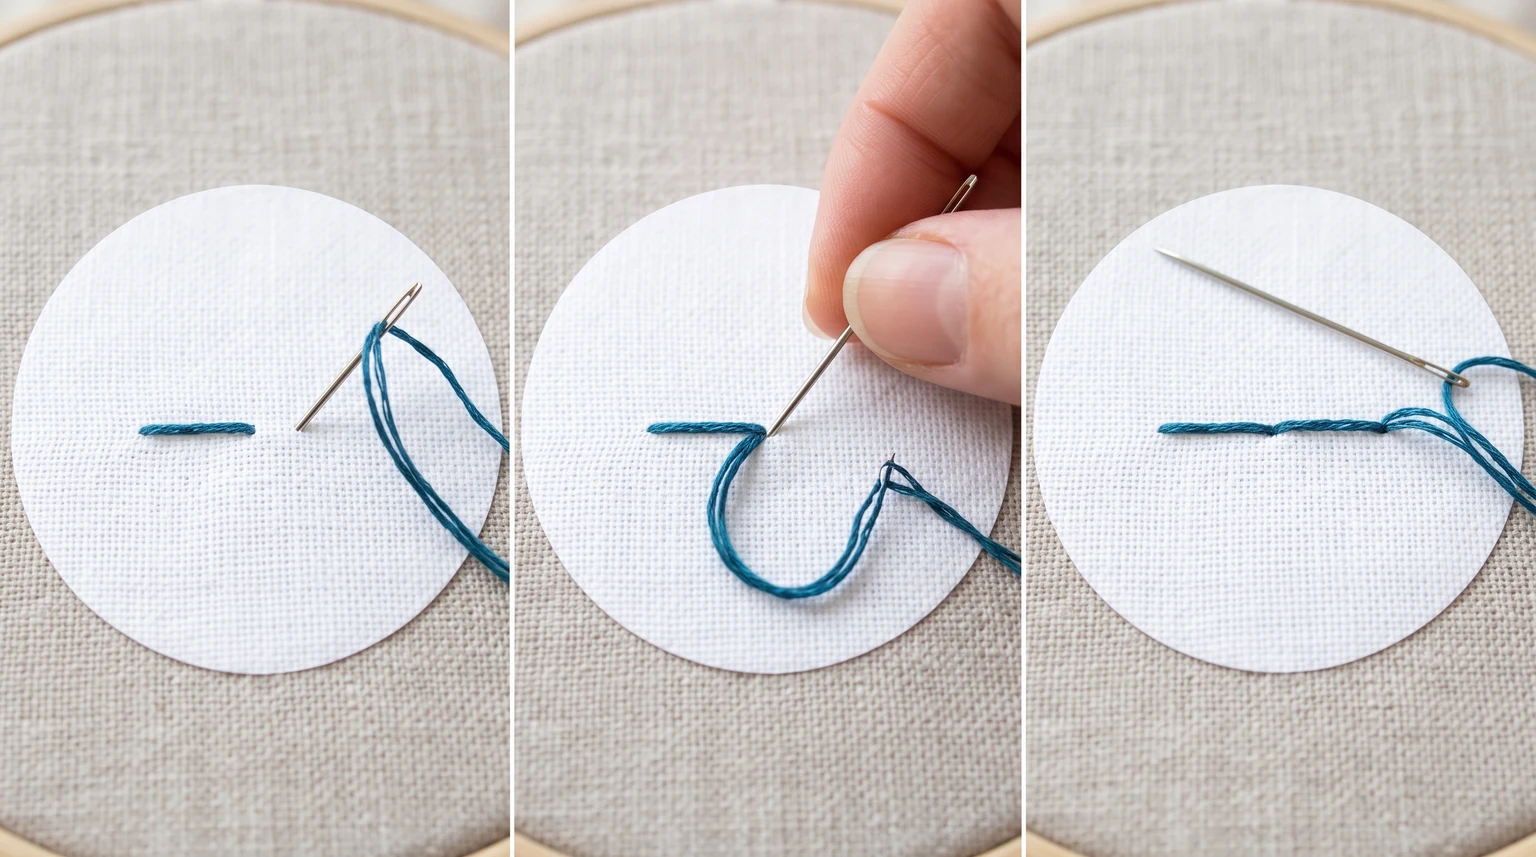
How to make backstitch
- Secure the thread on the back and bring the needle up at the beginning of the marked line.
- Go down a short distance ahead to make the first straight stitch.
- Bring the needle up another stitch length ahead of the first stitch's end.
- Insert the needle at the end of the previous stitch. This backward movement fills the open gap.
- Continue bringing the needle up ahead and taking it back to the previous endpoint.
- Finish by passing the working thread under several existing stitches on the back without pulling the line tight.
Use the same endpoint, rather than piercing the middle of the previous thread. Check the front as you go: the segments should meet without pulling the fabric into little dents.
Stitch curves, corners and lettering
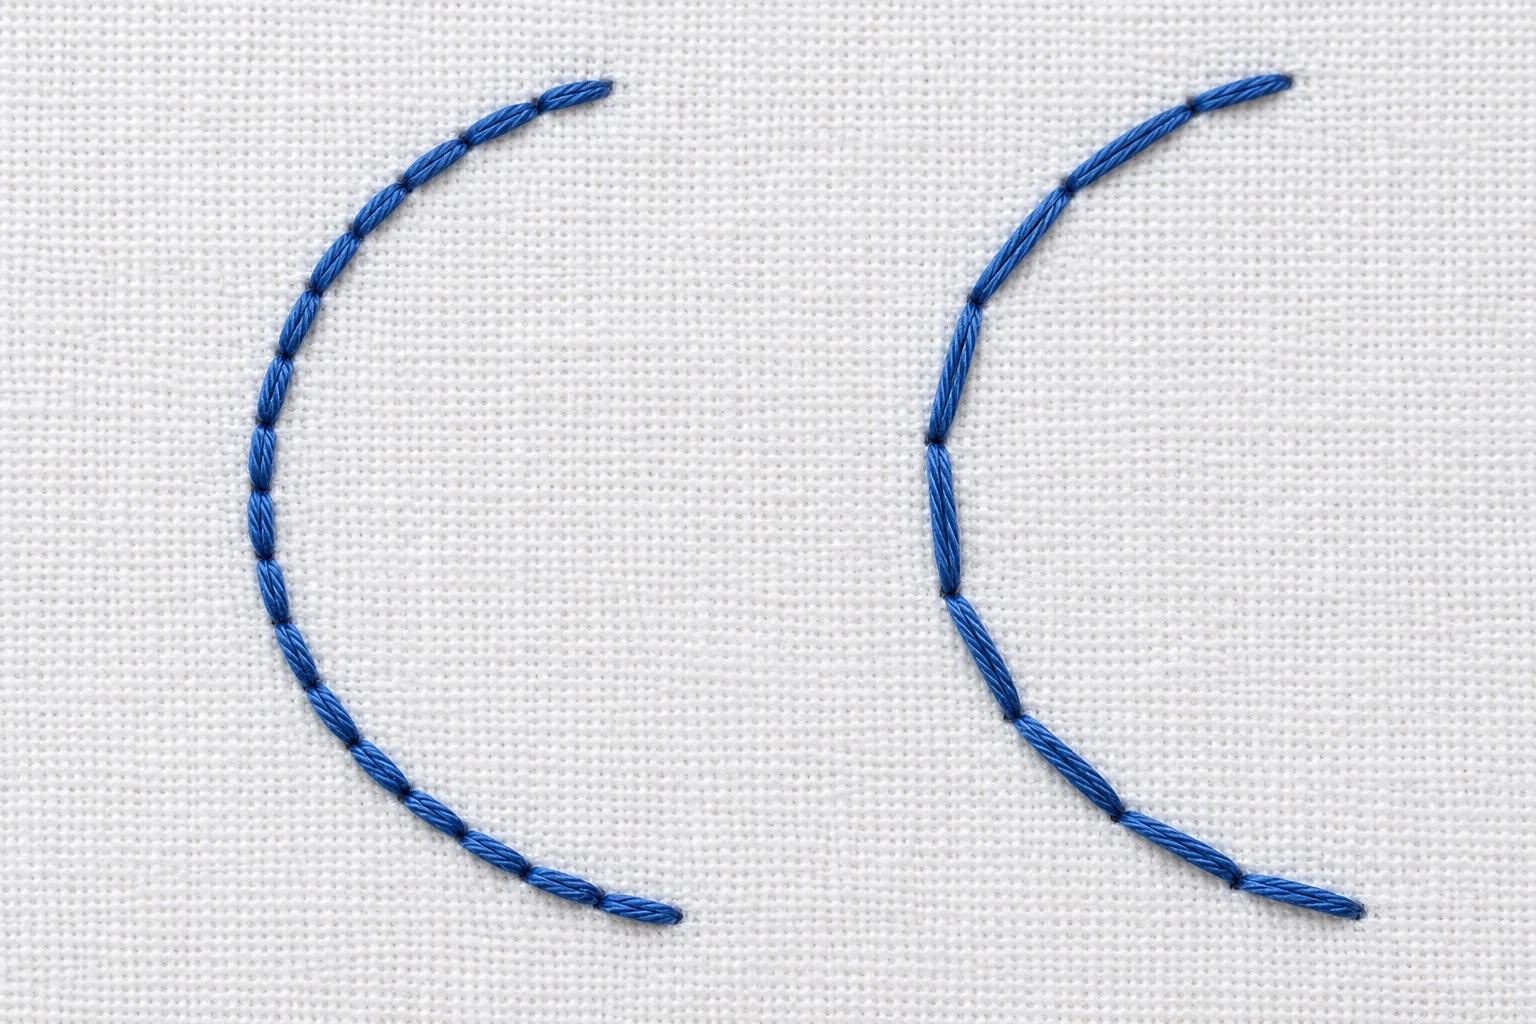
A curved outline is made from short straight segments. If those segments are too long, the curve becomes angular. Shorten the stitch length gradually as you approach a tighter turn, then lengthen it again on a straighter section.
Place a stitch endpoint at a sharp corner so the next segment can change direction cleanly. For lettering, begin with open, simply drawn letters at a comfortable size. Follow the center of each stroke and avoid adding so many stitches at a junction that the letter becomes a lump.
A longer smooth plant stem may be easier in stem stitch. Backstitch remains useful for the crisp edge of a leaf or a small geometric detail.
Fix gaps, uneven lines and puckering
Gaps between stitches: aim for the exact end of the previous segment. Do not increase thread tension to pull a misplaced stitch across the gap; remove and replace it while the area is still easy to reach.
Uneven line thickness: check that the strand count is consistent and that the needle is not splitting earlier stitches. Let twisted floss unwind before continuing.
Angular curves: remove a few long segments and replace them with shorter ones that follow the drawing.
Wrinkled fabric: release the hoop and inspect the cloth. If it remains gathered along the line, loosen the offending stitches. Each segment should rest on the surface without drawing its two holes toward each other.
A short backstitch exercise
Work a straight line, an S-shaped curve and a small square on the same scrap. Compare the regular sections with the corners. Try one line with one strand and another with three, using a suitable needle each time, to see how thickness changes the appearance.
Use a short backstitched stem in the beginner embroidery project. Add looped petals and a French knot center only after the stem lies flat. A small sampler makes it easier to identify what each stitch contributes.
Frequently asked questions
Is backstitch the same as running stitch?
No. Running stitch usually leaves spaces between visible stitches. Backstitch closes those spaces by working backward to the previous endpoint.
How many strands should I use for backstitch?
Two strands are a useful first test on woven cotton. Use fewer for fine detail or more for a bold line, checking the needle and fabric combination.
Can I use backstitch for embroidery lettering?
Yes. Use a clear drawing and short stitches that follow each curve. Larger, simpler lettering is easier to control than tiny tightly spaced letters.