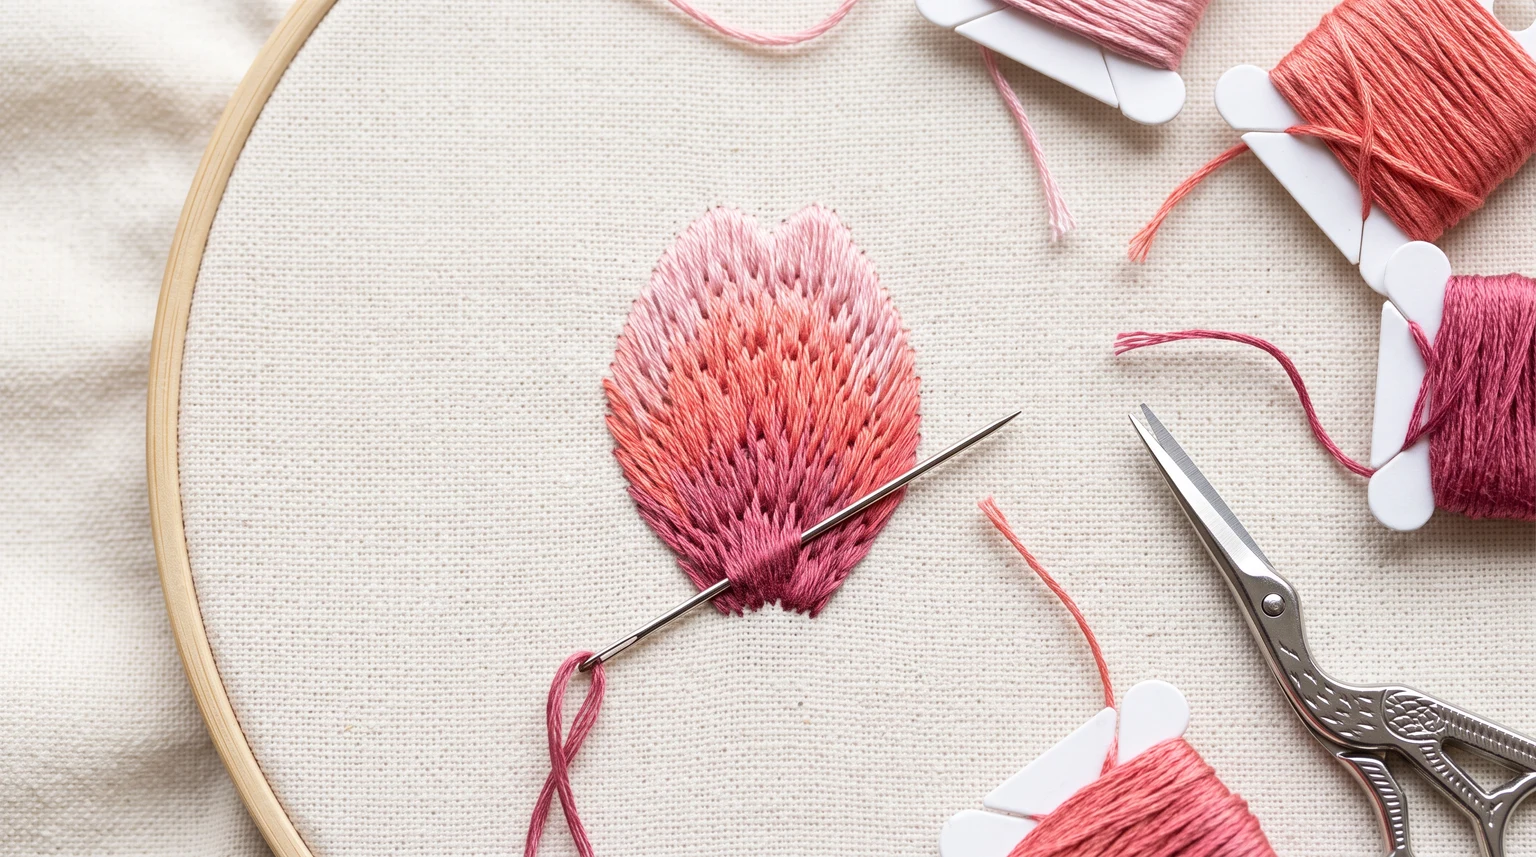
Long and short stitch fills a shape with staggered rows that can blend neighboring thread colors. It is useful for broad petals, fur-like shading and other forms where one long satin stitch would be difficult to control. The lengths should vary enough to break up the row edge while following the direction of the subject.
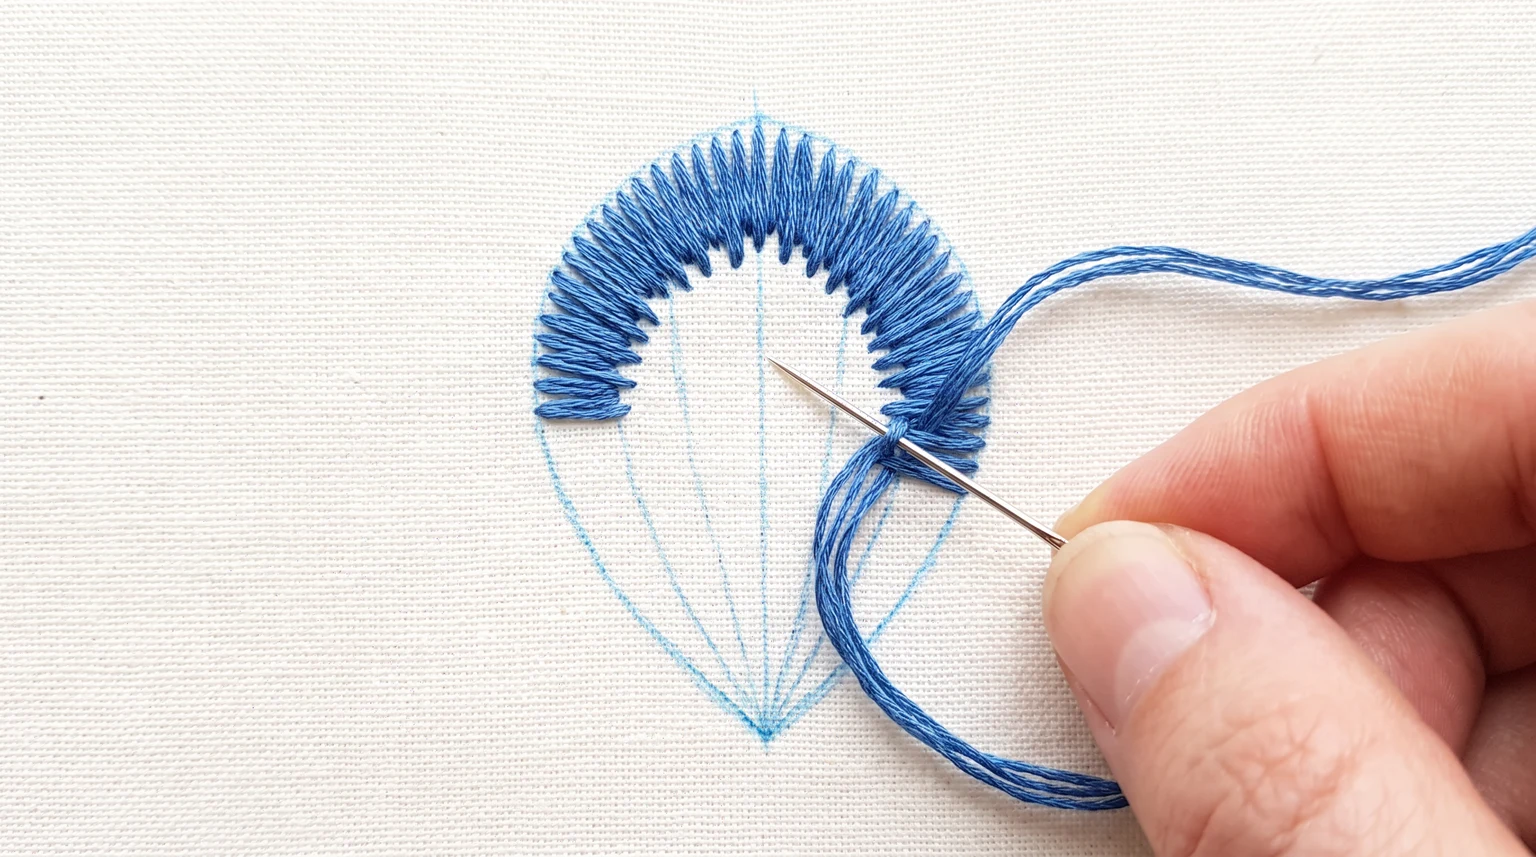
Work a first row with varied long and short ends. Add the next row between or into that irregular edge, maintaining the planned direction. Change to a nearby shade gradually instead of making a straight band across the fill.
Plan direction and a small palette
Mark the shape and a few direction lines. Choose two or three nearby colors so the practice focuses on the transition rather than a strong contrast. One or two strands can help you place individual stitches precisely.
Start with a simple small rectangle or petal. Look at where the light and dark areas belong before beginning. A random color change does not automatically create realistic depth.
Build staggered rows
- Work the first row from the boundary inward with varied stitch lengths.
- Keep the spacing close while avoiding a perfectly straight lower edge.
- Begin the next row at different positions within that irregular edge.
- Continue toward the inside of the shape, following the direction marks.
- Introduce the neighboring color gradually among the previous row's ends.
- Review the fill from a normal viewing distance before adding another layer.
The goal is a continuous surface, not a visible sequence of identical long-short teeth. Vary the lengths while keeping the overall direction coherent.
Fix stripes, gaps and heavy overlap
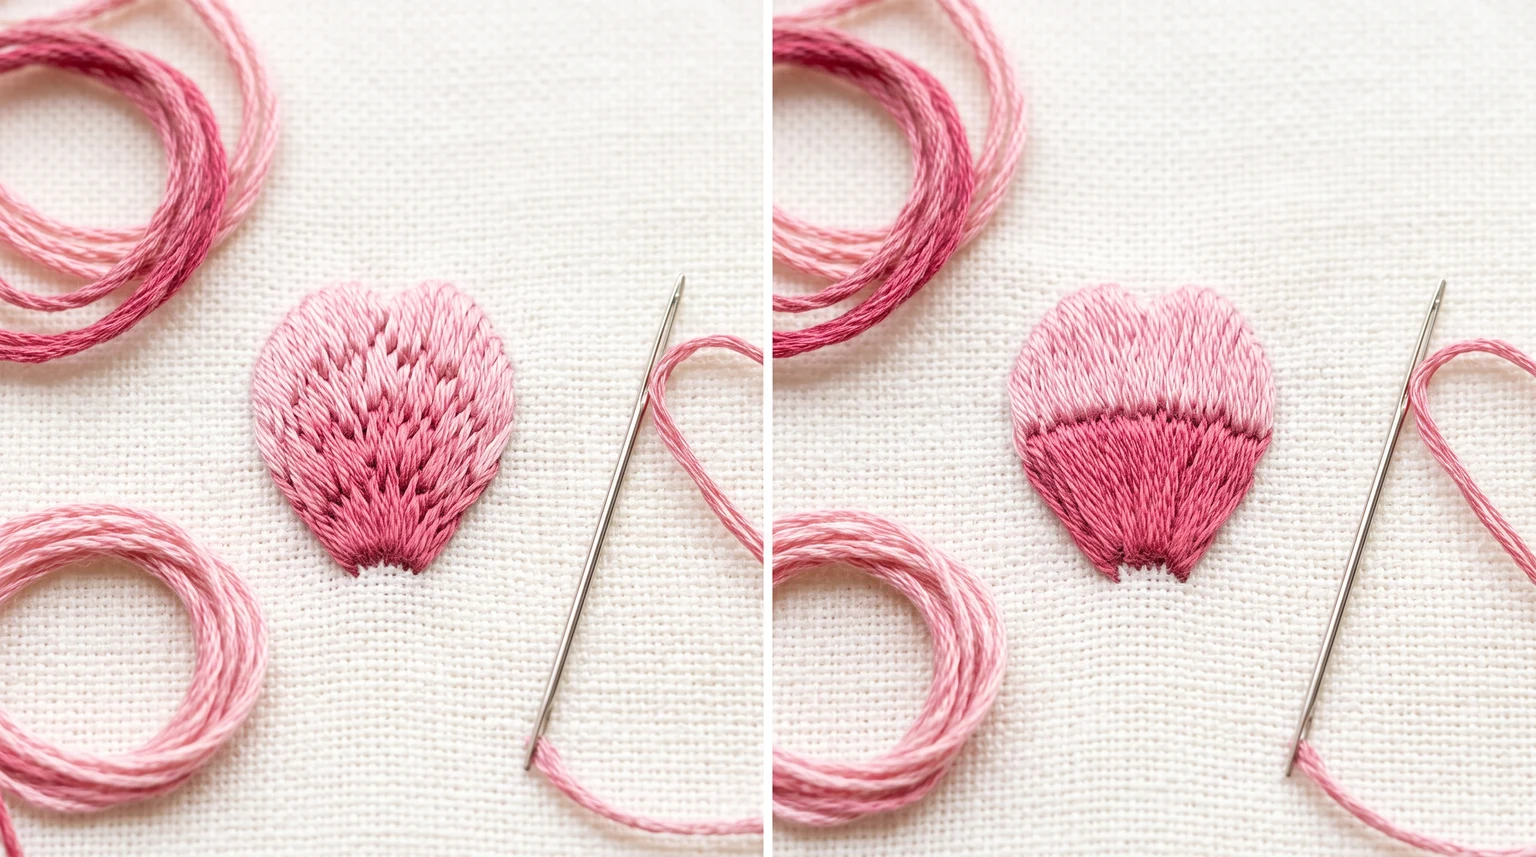
A straight color boundary or identical row ends can produce a stripe. Stagger the transition and choose shades that are closer if a gentle blend is the goal.
Gaps need better placement, while a bulky surface may have too many overlapping stitches or an overly thick bundle. Practise the same shape again with fewer strands before adding more thread to the existing fill. Compare this method with satin stitch for a small smooth solid shape.
Frequently asked questions
Must every other stitch have exactly the same length?
No. The name describes varied lengths used to stagger rows. A rigid repeated edge can make the rows more visible.
How many colors do I need?
Two or three nearby shades are enough for a first blending exercise. More colors are optional and should serve the shape's shading plan.
Further reading
Adapted from SimpleEnglishGuide.pdf, PDF pages 18. Wording and practical notes have been edited for this website.