
To transfer an embroidery pattern, you move the drawing onto the cloth so the lines guide your stitches. The best method depends on fabric color, thickness and how the finished item can be cleaned. A clear transfer makes stitching easier, but overly dark marks, shifted drawings or stretched fabric can create problems that are difficult to hide later. This transfer pattern guide explains how to choose and test a method before marking the full design.
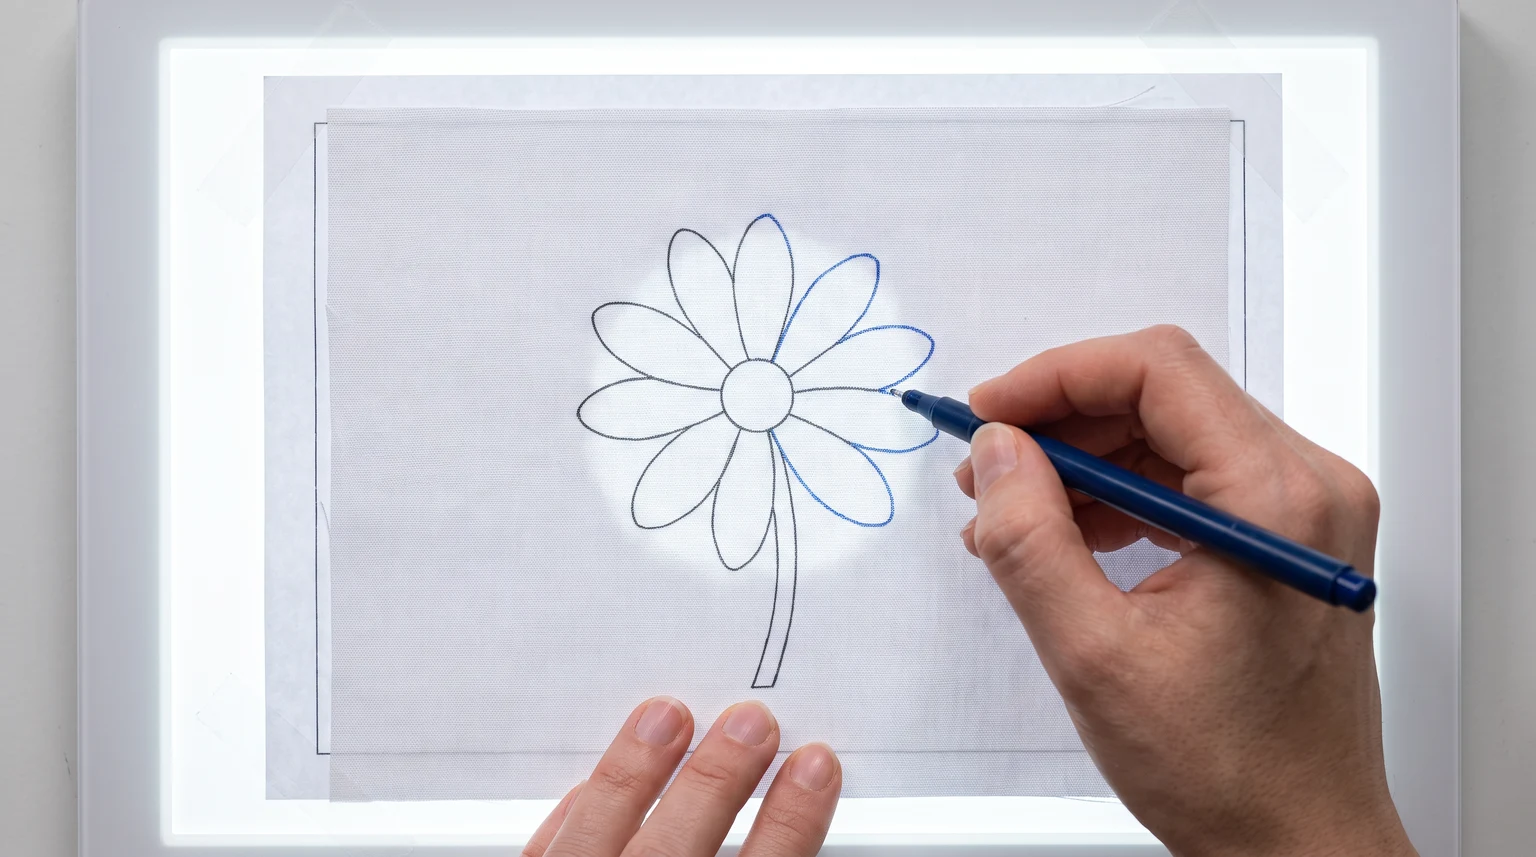
Trace through light fabric when you can see the printed design clearly. For dark or opaque cloth, consider suitable transfer paper or a removable stabilizer. Test both the marking and removal process on matching scrap fabric before transferring the project.
Choose a transfer method for your fabric
| Method | Useful when | Check first |
|---|---|---|
| Window or light-box tracing | The design is visible through light cloth | The fabric and paper can be held still |
| Embroidery transfer paper | Fabric is dark or too opaque to trace through | Marks show up and can be removed or covered |
| Printable soluble stabilizer | You want the drawing attached to the surface | Printing, adhesion and rinsing suit the materials |
| Manufacturer's iron-on transfer | A purpose-made transfer is provided | Heat settings, orientation and permanence |
Ordinary office carbon paper is not automatically suitable for textile work. Use a product intended for fabric and read its instructions. If you are still choosing a base, see the embroidery fabric guide.
Print and size the pattern before marking
Decide the final motif size before transferring. A printed design should fit the working area of your embroidery hoop, with room around the edge for stitching and finishing. If the download includes a scale marker, measure it after printing.
Print at the specified size when one is provided. Automatically shrinking a pattern to fit the page can make tiny details difficult to stitch. When reducing a design, simplify close parallel lines and check that petals remain large enough for the chosen stitch. Mirror a design only when the particular transfer method requires it.
How to trace a pattern onto light fabric
- Prepare and press the unmarked fabric according to its care instructions.
- Place the printed drawing against a bright window or light box, securing the paper so it cannot move.
- Position the fabric over the drawing with its weave straight. Hold it securely without stretching it.
- Trace lightly with a tested fabric marking tool, keeping lines thin and continuous.
- Lift a small corner to check the marks, then confirm the complete drawing before removing the fabric.
- Put the fabric in the hoop and make sure the design still has its original proportions.
Trace the outlines that actually guide the stitching. A woven rose needs a center and spokes, whereas a satin-stitched leaf needs a boundary and useful direction marks. Not every decorative line in a reference image belongs on the fabric.
Transfer onto dark or thick fabric
For textile transfer paper, arrange the cloth, transfer sheet and drawing in the order specified by the product. Trace the drawing with controlled pressure, lifting a corner to check visibility while keeping the layers aligned. Choose a mark color that contrasts with the fabric.
A soluble stabilizer can carry the printed or traced drawing while you stitch through it. Confirm that your printer and stabilizer are compatible and that both fabric and floss can tolerate the removal process. A small stitched test checks more than a blank rinse test: it shows whether residue remains around dense stitches.

Remove marks without damaging the embroidery
Follow the marking product's instructions; water-soluble and heat-erasable tools behave differently. Test for stains, returning marks and color transfer before using them on a finished item. Do not apply heat to unknown marks.
If a line will not come out, covering it may be possible when it lies directly beneath an outline. Do not add dense stitching everywhere simply to hide a transfer error. A clean backstitch outline or a slightly adjusted petal boundary may be enough for a small mark.
For a first attempt, use a spare piece of cotton and the simple flower in the beginner embroidery guide. Repeat the transfer until the shape is clear before starting the final hoop.
Frequently asked questions
Can I use pencil to transfer an embroidery pattern?
A light pencil mark may work if it will be completely covered, but it is not reliably removable from every fabric. Test it before choosing it for a finished piece.
Do I need to reverse the pattern?
Not for ordinary direct tracing. Some iron-on and other transfer processes require a reversed drawing; follow the instructions for that method.
Why does my transferred pattern look stretched?
The fabric may have moved or been stretched during tracing or hooping. Keep its weave straight, secure the layers and check the proportions before stitching.