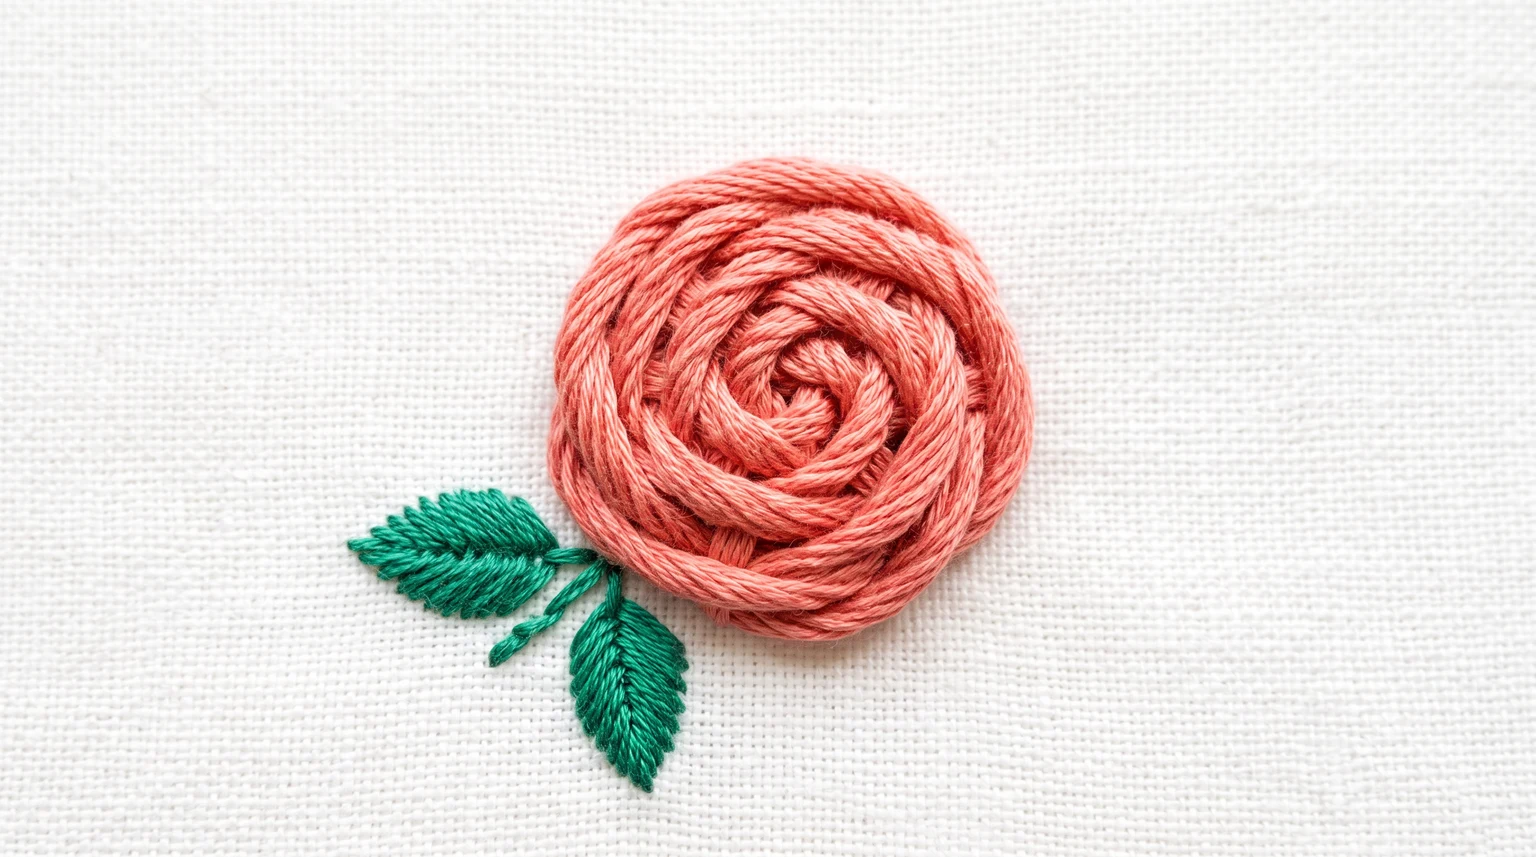
Rose embroidery can be created with woven wheels, curved outlines or individually stitched petals. A woven rose is a manageable first method because a few foundation stitches support the flower and most of the visible thread is woven above the fabric. This tutorial focuses on one small woven rose, then explains how to add leaves and adapt it to a larger floral pattern.
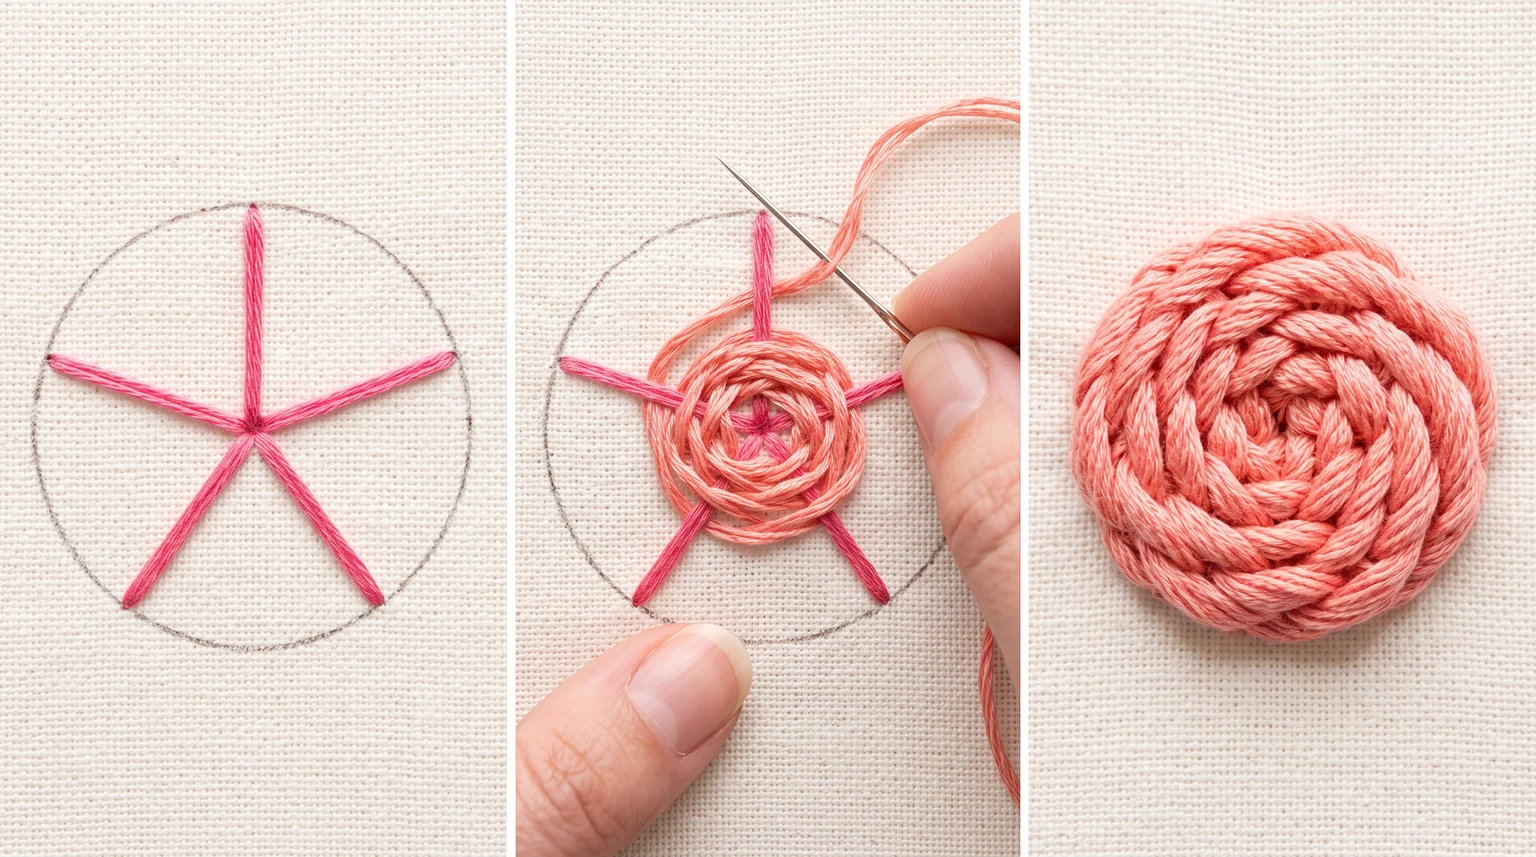
Mark five evenly spaced spokes from a center point. Stitch the spokes, then weave a separate thread alternately over and under them in a continuous circle. An odd number of spokes lets the over-under order alternate as you work around the rose.
Gather supplies for rose embroidery
You need stable woven fabric, an embroidery hoop, a sharp needle for the foundation, cotton embroidery floss and a tested marking tool. A blunt needle can help with the weaving because the movement goes beneath the supporting threads rather than through the cloth.
Try a rose about 15 mm across before making a tiny one. Use a pink or red thread for the flower and green for the leaves. Three to six strands can produce a substantial woven flower, depending on the size; sample the combination rather than assuming every rose needs the same count.
Mark the center and five spokes
Draw a small circle, mark its center and divide it into five reasonably even sections. Draw a line from the center toward the boundary in each section. The lines guide the foundation stitches; you do not need to draw every petal.
Use the transfer pattern guide to choose removable marks appropriate to your cloth. Keep the circle light because the outside boundary may remain visible if you stop weaving before covering it.
With a sharp needle, make one straight foundation stitch along each spoke, bringing the threads together at the center. Secure them firmly enough to support weaving without pulling the fabric inward.
Weave the rose over and under the spokes
- Secure the weaving thread and bring it up close to the center between two spokes.
- Pass the needle over the first spoke and under the next, staying above the fabric.
- Continue the over-under rhythm around the wheel. Avoid splitting either the spokes or the weaving thread.
- Let each round sit beside the previous one, building outward from the center.
- Keep the tension loose enough to form a raised flower while keeping the rounds together.
- Stop when the foundation is covered to the size you want, then take the thread down discreetly beside or beneath the outer edge.
- Secure the thread on the back without tugging the flower flat.
An odd number of spokes makes the alternating path work around successive rounds. Concentrate on even placement before adding a second shade or increasing the flower size.
Add stems, leaves and a balanced layout
Work nearby flat stitches before weaving a large raised rose when they would otherwise be difficult to reach. Use stem stitch or a short backstitch line for the stem and small satin stitch fills for leaves.
For a little bouquet, vary the position of two or three roses rather than repeating the same flower at identical spacing. Leave room between raised flowers for the needle to pass. A single thread shade can look dimensional because the woven rounds catch the light differently.
Troubleshoot uneven or flattened roses
The rose looks flat: the weaving may be pulled too tight. Work the next sample with gentler tension so the thread builds above the spokes.
One side is larger: check the spoke lengths and whether the center sits in the middle of the circle. An uneven foundation becomes more visible as the flower grows.
Spokes are still visible: add another round only if there is room, or accept a smaller flower on the practice piece and shorten the foundation next time.
The thread catches: guide the needle beneath the spokes carefully and try a blunt tip for the weaving stage. Keep the raised flower away from the hoop edge when repositioning the fabric.
Once you can make a consistent woven wheel, compare it with the rose motifs in flower embroidery patterns. A pattern with outlined petals may need a different stitch plan from a raised woven flower.
Frequently asked questions
Why do woven roses use five spokes?
Five is an approachable odd-numbered foundation. The odd count lets an alternating over-under path switch position on successive rounds. Other odd counts can also work.
Is woven rose embroidery suitable for beginners?
Yes, as a small practice motif after you can make straight stitches and control thread tension. Start with a clear foundation and one color.
Do I pierce the fabric while weaving the rose?
The weaving mainly passes over and under the supporting spokes above the fabric. You pierce the fabric to start and end the weaving thread.