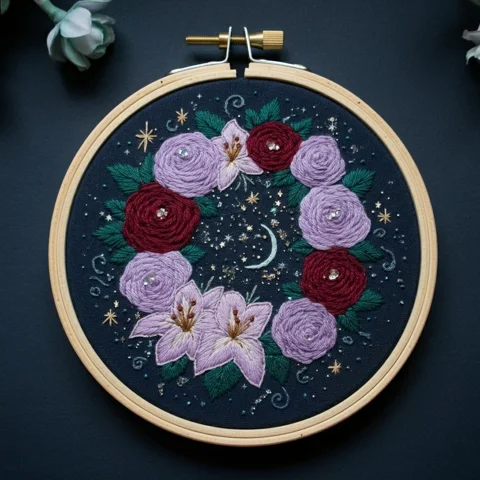
About this Garden Archway Rose Bouquet embroidery pattern
Garden Archway Rose Bouquet brings floral and botanical details into a hand-embroidery composition. Study the colored design and outline together before choosing which shapes to shade, outline or simplify.
The colored image is a design reference. Thread, fabric and your stitch choices will affect the finished result. Preserve the open spaces around the smaller motifs and test difficult fills on a spare piece of fabric before stitching the main design.
Printable outline preview
This watermarked preview shows the transfer drawing. Clean outlines are included in the purchased pattern PDF.
Choose your hoop size
The outline pages are labeled for 3, 4, 5, 6, 7, 8 inch hoops. Measure the printed design before transfer, because printer margins and fit-to-page settings can affect its dimensions.
A larger version gives fine contours and clustered motifs more room. Select the size that preserves the details you want to stitch.
Color and stitch guidance
The supplied PDF contains the design's DMC color suggestions and stitching guidance. Compare important shades with real floss under your working light.
The supplied guide labels this design beginner. Allow time for controlled spacing and detailed areas.
Stitching sequence
- Step Execution Instructions & Technical Angles 1. The Archway Framework Architectural Bounds: Stitch the two parallel lines of the arbor using 2 strands of Brown (433) in Backstitch. Keep the stitches small around the top curve to maintain a smooth semi-circle. Add the winding green vines (3347) wrapping around the arch. 2. Archway Florals Climbing Tulips: Stitch the small yellow tulip buds (743) climbing the arch using Satin stitch. At the base of the arch on the left and right, add the large green leaves (895) pointing outward using Fishbone stitch. 3. Bouquet Foliage Central Base: Move to the center bouquet. Stitch the bundle of tied green stems at the bottom using Stem stitch. Add the radiating green leaves (3346) using Fishbone stitch to create a bed for the roses. 4. Woven Wheel Roses 3D Focal Point: Mark 5-point stars for each of the 5 roses. Stitch the foundation stars with 2 strands of matching floss. Switch to a blunt tapestry needle and 6 full strands of floss. Weave over and under the spokes continuously until the star is completely covered and the rose is puffed up. 5. Lavender Accents Purple Flourishes: Finish the bouquet by stitching the tall, spiky lavender stalks (333). Use a central straight stitch for the stalk, and tightly cluster 2-wrap French knots along it to create the textured buds. Master Stitching & Tension Guidelines The Woven Wheel Mandate The Woven Wheel Rose *must* have an odd number of foundation spokes (usually 5), otherwise the over/under weaving pattern will fail. You must also use a blunt tapestry needle for the weaving step. If you use a sharp embroidery needle, you will pierce the foundation spokes or the fabric, ruining the 3D spiral. Preserving Rose Volume When weaving the roses with the full 6 strands, do not pull the thread tight. Lay the thread gently over the spokes, allowing the natural bulk of the 6 strands to build upward. Keep weaving until the foundation spokes are completely invisible beneath the petal rings. Backstitch Smoothness The brown architectural archway requires very neat backstitching. To ensure the line looks solid and not dashed, always bring your needle up a stitch- length ahead, and push it down into the *exact* same hole that the previous stitch ended in. There should be zero gap between stitches. Hooping the Final Piece Because the Woven Wheel roses stick out so far from the fabric surface, be extremely careful if you ever need to iron or press the finished piece. Never iron directly over woven wheel roses, or you will crush them completely flat. Steam the piece gently from the back only
Review the full guide in your download for motif-specific thread placement. General techniques are covered in pattern transfer methods and finishing an embroidery hoop.
What your download contains
Your purchase opens a private Google Drive folder containing the three listed PDFs. The clean outline is inside the main pattern PDF. The gridded image reference is separate from the surface-embroidery drawing and is not a machine embroidery file or a symbol-by-symbol DMC cross-stitch key.
Download access appears after payment is confirmed, with recovery available through the purchase email. See the delivery policy for access and support details.
Pattern questions
Is this for hand embroidery?
Yes. The outline and stitching guide are for hand embroidery. No machine-ready PES or DST file is included.
Will I receive a physical kit?
No. This is a digital pattern package. Hoops, needles, thread, fabric and a finished piece are not included.
Can I sell a finished embroidery piece?
You may sell small quantities of physical pieces stitched by you under the pattern license. You may not resell or share the digital pattern files.
What if I cannot open or download the files?
Use order recovery or contact support with your order reference. Damaged files, duplicate purchases and delivery problems are covered in the refund policy.
More floral patterns